Yosemite- spider bites, tomatoes, chili + hotdogs


Last weekend I went to Yosemite and basically was out of breath the entire time. I am not much of a hiker, despite everyone telling me that it’s really just “walking in nature.”

After an entire day of exerting myself, looking at rocks, and eating nothing but nuts and berries, all I really wanted to do was return to our rented house and stuff my face with chili, hotdogs, and beer. Everyone ate ravenously. I’m not documenting the chili on here– though it’s pretty hard to screw up chili, this didn’t end up being anywhere near my best effort (I make it differently every time). At 9:30 at night, though, after a day of eating bird food I am pretty sure no one was complaining.

These gorgeous garden tomatoes were brought by one of the hikers in our group, Nicole. Even on top of chili, I could tell this was a special tomato. At the end of our trip when she asked the group if anyone wanted to take tomatoes home as her garden was full of them, I selfishly piped up before anyone else had a chance. The next day I had this delicious dinner.

These tomatoes were so sweet and flavorful that all they needed was a sprinkle of salt and it would have been a sin to do anything else to them. Can’t even come close to supermarket tomatoes.


Oh and P.S.– I have been attempting to chip away at my bounty of garlic:


I made 100 clove garlic soup one day. I was basing it off a recipe from smitten kitchen, and thought 100-clove sounded much better than 44. Learn from my mistake and stick with Deb’s version. It is silky, with just the right balance of roasted garlic to balance out the nearly raw. It sounds off-putting but is actually just extremely flavorful, comforting soup that will cure whatever ails you. Read the reviews under Deb’s recipe if you don’t believe me– when I followed it to the letter, my soup turned out insanely good.


Now I will continue to nurse my infected spider bite from Yosemite by gobbling insane amounts of antibiotics. Cooking adventures from the past few days to come.

Rum Cake

A few kitchen failures and a weekend of driving and beach-lounging means I have to go back in time a little bit for my post today. I made this cake for our Polish Easter breakfast, but it’s perfect any time of year.

This is my Aunt Angie’s recipe; she always makes it for Thanksgiving. When I called her to ask for it, she searched through moving boxes for me until she found the old magazine clipping this recipe comes from.

Ingredients: 

For cake:

     1 cup chopped pecans or walnuts

     1 18.5 oz box yellow cake mix

     1 box vanilla instant pudding

     4 eggs (or 3 eggs if pudding already in cake mix)

     ½ cup cold water

     1/2 cup oil (or 1/3 cup oil if pudding already in cake mix)

     1/2 cup rum (I used some really good dark rum Magda brought back from Panama. Any kind of dark or spiced rum will do. )

 For glaze:

     1/4 pound butter

     1/4 cup water

     1 cup granulated sugar

     1/2 cup rum

Directions: 

Grease and flour a 12 cup bundt pan. Sprinkle the nuts on the bottom of the pan.

Mix all cake ingredients together, and pour over the nuts. Bake for 1 hour in a 325 degree oven.

Let cake cool, and invert onto a serving plate. With a fork, pork holes into the cake. Poke many, many holes. Keep poking. The more holes, the more rummy goodness in the cake.

Now to make the glaze: Melt the butter in a saucepan. Stir in the water and the sugar. Boil this for 5 minutes while stirring constantly. Remove this from the heat, then add your rum. You do this after removing from the heat, so that none of the alcohol cooks off the rum.

Now for the fun part.


Pour the glaze slowly over the cake. Let it seep into the cake before you start pouring more. Keep repeating this, and it will seem like you are pouring entirely too much glaze into the cake. Don’t worry. Turn the cake upside-down and pour glaze into the other side. Don’t stop until all the glaze is gone.

Eat it for dessert, and eat it again for breakfast the next morning. The cake will taste pretty boozy because of the glaze, but completely delicious. It will be best the 2nd or 3rd day after you make it.

Next up: what to do with the giant bag of garlic I picked up in Gilroy today on the way home from Huntington Beach?? Perfect project for my day off tomorrow.

<3<3 Megs ‘n Eggs

Ricotta Gnocchi

…it is a ball of cheese, that is somehow also light and fluffy and airy, but it’s still a ball of cheese.  And it’s warm and a little bit gooey inside, but with a taste delicate enough to showcase sweet summer squash. Don’t eat this with a heavy sauce, but drizzle it with butter browned until just nutty.

Image

First, about the ricotta: Do not buy the watery supermarket ricotta. This time, I used Angelo & Franco from Fresh & Easy, but look for anything sold in a basket like this so that it can drain:

Image

Even better, make your own ricotta like Deb from Smitten Kitchen. I used her recipe for ricotta last time I made this dish, but it’s so yummy you will want to slather it on bread or tomatoes or anything in sight before you have the chance to turn it into gnocchi.

Ingredients:

10 oz well-drained ricotta cheese 

1 egg

1/2 tablespoon melted salted butter

6 large leaves of fresh basil, chopped or chiffonade 

1/3 cup finely grated hard Italian cheese (I have used Parmesan, Grana Padano, and Romano before and all work well.)

Salt to taste (I used about 1/8 teaspoon, but adjust according to the saltiness of your cheese.)

All-purpose flour 

4 tablespoons butter for the sauce

1 medium-size zucchini 

Directions: 

Beat the ricotta in a medium bowl with a fork for a few minutes. Add the melted butter, egg, basil, and parmesan. Beat the whole thing for awhile, as the longer you do this, the lighter the gnocchi will end up. I don’t always do this step, but this time I added a tablespoon of flour to the batter as well. The absence of flour is what makes these gnocchi so light, yet I found after a test poach I needed just the smallest amount to keep them from breaking apart once they hit the simmering water.

At this point, taste your mixture. Add salt as necessary. If you have cherry tomatoes laying around, take a break to smear some of this stuff onto a tomato half and top with a basil leaf. This should hold you over until your gnocchi is ready.

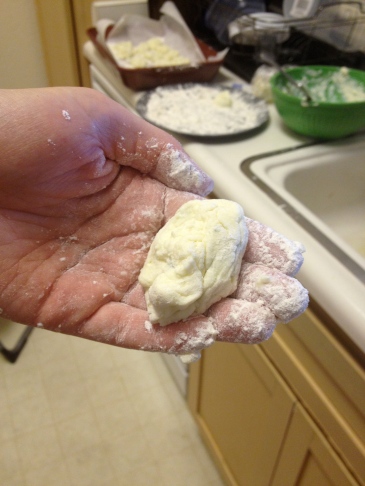
Ok, now you are ready to form the gnocchi. Coat  a dinner plate or a pan in flour. Get a spoonful of the mixture, and drop a ball of it onto the plate of flour. You may need to use your hand to slide it off the spoon. Sprinkle some flour on the top and sides, then roll it around to lightly coat. These do not have to be beautiful, perfect ovals. In fact, mine weren’t much to look at:

Image

Line a pan with parchment paper and sprinkle with flour, and add the gnocchi to this pan. This recipe makes about 15 gnocchi. It’s a good idea to test one first, to make sure it is sturdy enough not to fall apart. If it falls apart in the water, add more flour a teaspoon at a time. Once your gnocchi have been formed, put the pan in the freezer for about 20 minutes. This will keep them sturdier for cooking.

While the gnocchi is cooling, cut your squash into matchsticks. (Judy Rogers suggests some excellent accompaniments to the gnocchi itself on Epicurious. The squash matchsticks is by far my favorite, because as Judy says, its subtle flavor only becomes clearer next to the gnocchi.)

Image

Before you begin to cook your gnocchi, spray a piece of foil with cooking spray and place squash on it. Sprinkle with salt, and fold the foil over so that it forms a packet. Place in a 425 degree oven. This should cook for no more than 10-15 minutes. When you are ready to cook the gnocchi, put the 4 tablespoons of butter in a small saucepan and turn to low. Then, add your cooled gnocchi to a simmering pot of water. Cook 3-5 minutes before draining. As the gnocchi is cooking, watch the butter. You’ll want to take it off the heat the second it turns brown and starts to smell nutty and delicious.

If you’ve timed it right, the three elements will be ready at once. I had 3 girls over, so plated these as appetizers, with 3 gnocchi per plate. Place a handful of zucchini into the center, and drizzle the whole thing with brown butter. This would serve as appetizers for 4, or a light dinner for 2.

❤ Megs ‘n Eggs

Adapted from Epicurious Zuni Ricotta Gnocchi and Cooking off the Cuff Ricotta Gnocchi. Inspired by Deb’s Rich Homemade Riccota

Poquito Picante

Image

The first time I had this drink was almost a year ago when I flew to New York for Bunny’s birthday. She took us to this little Latin tapas bar called Yerba Buena. We ducked into this dark little bar, and though we were late for our reservation, instead of being snobby, the management found a place to squeeze us despite how packed it always is. The length of the bar was full of these gorgeous drinks that looked like margaritas without ice and with a single dried chili pepper floating in each. I had no idea what was in it, and immediately ordered one by pointing. I’m not trying to be dramatic here, but what I tasted changed my entire outlook on cocktails, if not alcohol in general. I had no idea when I ordered it that somehow, all these flavors would be packed into a 4 oz. cocktail:

Image

… Each taste is distinct and clear as you sip the drink. The cilantro shines through, green and fresh, and is mellowed by a hint of cucumber. The fresh lemon juice calms the gin and almost cancels out its piney flavor, leaving just enough to strengthen the spicy finish from the jalapenos.

I had been lamenting over this drink ever since I tried it. I don’t know why it didn’t occur to me to try and recreate it until Magda heard me whining about how good it was and said “why don’t you make it this weekend?” In fact, i grabbed all the ingredients at the Mexican grocery near my place for under $5 (minus the booze, of course) that afternoon, and made this on Saturday night.I was glad not to be the designated driver because these are pretty potent, just to warn you.

Ingredients: 

A bunch of chopped cilantro, about 10 leaves

4 slices of cucumber chopped up into quarters

3 slices of jalapeno— whether or not you deseed depends on the spiciness of that particular jalapeno, and your tolerance for spice

3/4 oz  fresh lemon juice (about the juice of one lemon)

1/2 oz cointreau ( I used Triple Sec here. I couldn’t justify the expense of Cointreau and it tasted just as good as I remembered)

2 oz Tanqueray gin (hooray, Magda had some laying around so we didn’t have to splurge. I love using what’s on hand)

3/4 oz simple syrup (Listen to my food-blogging idol Deb of Smitten Kitchen on this. Don’t buy it in a store. Just simmer one part water with one part sugar until the sugar dissolves, then refrigerate it until cool.)

Dried chiles for garnish 

Directions:

Muddle the cilantro, cucumber, and jalapeno with the lemon juice. Add the booze and simple syrup. Shake with ice and strain through wire mesh, if you have it. We didn’t, and used a normal martini shaker. There were small pieces of cilantro and probably cucumber seeds left, but no one was any worse off. Garnish with a dried red chile.

<3<3 Megs ‘n Eggs

*Just to note: I steer clear of gin as a rule and never would have ordered this if I’d bothered to read the menu. I even tried a perfectly respectable version of this drink later on in the night with tequila and lime replacing the gin and lemon. But the first version was absolutely perfect and still the standard by which I measure all cocktails.

Aside

Meal diary

I want this blog to reflect how I actually eat. I obviously love to cook, but I didn’t exactly get around to it at all today. My day of eating, embarrassing as it may be:

Breakfast: Cheezits

Lunch: Taco bell burrito

Dinner: 3 squares of Lindt Chocolate and a Miller Lite

An actual recipe to come this weekend!

❤ ❤ Megs ‘n Eggs

Boozy smoothies

I will admit I had bigger plans for my Sunday post than French toast. I meant to drive to the store and buy the nice ricotta I needed to make gnocchi, but the pull to do this instead was just too great:

Image

So it was 5-minute French toast for breakfast, and for dinner, nothing too fancy (but entirely satisfying): we gnawed on some chicken legs my roommate threw on the grill after our day of pool lounging. But what was our sustenance between the two meals?

Image

These delightful concoctions, which we have been finding excuses to drink all summer long. They are almost all fruit, so they really do fill your stomach if you can’t be bothered to cook lunch, and you can offset the guilt of drinking during the day by thinking about all the antioxidants you must be consuming.

Do not stress over the measurements. Add a couple extra glugs of rum at the end and no one will complain.

Ingredients: 

About 8 oz frozen fruit (today we used peaches, raspberries, and strawberries, but pineapple, mango, blueberries, and anything else sold in bags in the freezer section work well too.)

1 banana

2 tablespoons plain or vanilla yogurt

6 oz of fruit juice (on this day we had run out, and actually used Fresca– it turned out delicious)

A teaspoon of honey or agave nectar

3 ice cubes

6 oz spiced rum *Note: If making virgins, (though as my roommate Magda says “you might as well be at Jamba Juice,”) sub 6 oz fruit juice, or water if you don’t need the extra sugar.

Directions: Place everything in the blender. Depending on the strength of your blender, you can do just the ice and yogurt and banana first and add the rest later, but we did it all at once:

Image

Blend until smooth. Adjust to your own taste. If the fruit isn’t terribly sweet, add some more honey. If it is too thick and not blending, add more liquid. If you would like it smoothie-er (?) add some yogurt. If we are going down to the pool, we make two batches of this because 2 blenderfuls fit perfectly in our plastic pitcher we take with us. If you are like us, you will want to serve this with a floater of rum on top for good measure. Perfect lazy Sunday!


❤ ❤ Megs ‘n Eggs

French Toast

Image

Last night I had a ticket to see Les Mis at the Orpheum in San Francisco. I decided to spend the evening doing exactly what I felt like doing, which ended up being to drink wine and have an entire cheese plate to myself for dinner. The last couple times I went to wineries in Sonoma and Napa, I went the whole day without trying a single wine I would have chosen to have more than one sip of. Last night, the woman at  Pause Wine Bar poured me three different reds that were all delicious. They rotate their by-the-glass selections so that you can conceivably try everything on their menu at some point.

How can I transition from Les Mis to breakfast this morning? Well, I guess it goes with the French theme, though I suspect french toast is about as french as french fries. I made this today because my freezer is full of half-loaves of Italian or sourdough bread– that stuff goes stale so fast when you buy it fresh. I keep this on hand for garlic bread, croutons, or this:

Image

Ingredients:

2 eggs

1/4 tsp cinnamon

1/2 tsp vanilla

1.5 tablespoons granulated sugar

smallest pinch of salt

Any kind of stale bakery bread

Directions: Mix everything together.

Image

Soak the bread slices in the egg mixture on both sides, then drop into a hot, buttered pan.

Image

Brown both sides.  Serve with powdered sugar or maple syrup.

Image

Moral of the story: Don’t throw out your stale bread!

<3<3 Megs ‘n Eggs

Green salsa

I made the most delicious white bean, green chile, chicken chili today. I will post it once I come up with a more catchy name for it. Until then, I will post one of the components of the dish: green salsa. I usually use canned for the soup, but this salsa would work even better, and is delicious on its own.

This salsa was inspired by a trip to Milkpail in Palo Alto, my favorite market to get cheap produce and (ridiculously) cheap cheese. The poblano peppers, tomatillos, and cilantro all caught my eye since they were on sale. I had seen an article on canning in Food Network Magazine, and though I didn’t want to fool with the hassle of buying supplies for such an involved process, it made me want to try green salsa. Mine turned out brighter and even prettier than their canned version.

Ingredients:

2 large (or 3-4 small) poblano peppers

About 12 tomatillos

1 red jalapeno

Half a large onion

2 large cloves of garlic

A bunch of cilantro

Salt to taste

Cumin to taste

2 tablespoons olive oil

Splash of white vinegar

Directions:

Cut peppers in half and deseed. Reserve some of the seeds for some extra heat, if you’d like. Cut the onion into quarters and the tomatillos in half. Arrange all veggies onto a broiler pan like this:

Broil them for about 5-10 minutes. Watch closely so that they don’t burn. Take the pan out when they look like this:

Before proceeding, the poblanos and jalapenos need some extra care. Place them in a plastic grocery bag and tie it off. Let them sit for 15 minutes like this. When you remove them, the skin should peel off easily. Make sure you broil them for long enough that they get a nice brown char on top, or else the skin will get stringy and become hard to peel. (Note: I don’t have a gas stove in my crappy apartment kitchen, but if you do, you can char the peppers right over the flame.)

Chop the peppers into smaller pieces. Put everything into a blender or food processor. I used a mini chopper I bought for $20 from Walmart. You will want to use enough olive oil so that everything blends smoothly, but not so much that it becomes greasy. Add about a quarter cup of chopped cilantro leaves, and a pinch of salt and cumin. Taste this before you add the vinegar. The tomatillos will make this salsa quite tart, and it might not need any. If you would like, add a splash–I added about 1 tablespoon. 

I took this to work the next day with tortilla chips and it was demolished. My poor roommate hardly got to try any : ( I also used some on my almost daily meal of bean-and-cheese quesadillas.

❤ ❤ Megs ‘n Eggs